Recent Posts

Showing posts with label DIY. Show all posts

Wednesday, April 27, 2011

Fresh spring rolls

Despite the flurries we've been getting every few days (and the fact that I am afraid to take the studded tires off my car) it IS technically Spring!  And what better food for Spring than fresh, Vietnamese-inspired spring rolls.

We all know that crispy, deep-fried spring rolls are amazing (as demonstrated recently by a good blogger friend).  Sort of like eggrolls but more bite sized.  But have you tried fresh spring rolls?  They are served cold and present the refreshing flavours of-mint, cilantro, and cucumber.  The cucumber, rice vermicelli and grated carrot provide addictive texture.  And, you know, they are not that hard to make!

Fresh Spring Rolls

A good online recipe is found here.  Let me take you through it.

To make 12 - 15 rolls, you will need:

1 pkg rice paper wrappers (there will be some left over)
1 pkg rice vermicelli, prepared as per package instructions
1 cucumber, seeded and sliced into matchsticks
2-3 carrots, shredded
1/2 cup chopped unsalted peanuts
1/2 cup fresh cilantro, chopped
1/2 cup fresh mint leaves, chopped

For the marinade:

1 tsp sugar
2 tbsp fermented fish sauce
2 1/2 tbsp lime juice

Combine the marinade ingredients.  Give 2 tbsp to the noodles, 1 tbsp to the carrots+peanuts (mix them together), and 1 tbsp to the cucumber matchsticks.  For anyone who crinkles their nose at the works "fermented fish", just let me say that fish sauce is the magical ingredient that adds that je ne sais quoi to so many delicious asian recipes.  So give it a shot!  It's like an extra flavourful soy sauce.

Now you're ready for the assembly!  I recommend having a fabulous assistant or two.  There is an illustrated montage at the bottom of these instructions.

1.  Prepare your work area:  one station should have a pie plate or shallow pan containing 1-2 inches of lukewarm water for soaking the rice paper, the other should have a clean, damp tea towel to blot the paper and do the assembly.
2.  Soak the rice paper in a few inches of lukewarm water for about 1 minute, or until the paper loses its stiffness and becomes slightly sticky.
3.  Blot the rice paper dry by laying it on the damp towel, folding the towel edges over the paper and lightly pressing to remove excess water.
4.  Add the fillings:  4-5 pieces of cuke, a spoonful of carrot+peanut mixture, a sprinkle of fresh herbs, and a glob of noodes (you will get a feeling for the appropriate amount of noodles as you make a few rolls).
5.  Now when it comes to positioning the fillings on the rice paper, I didn't think I could describe it properly so here is my feeble attempt at illustrating it for you:
6.  Now that all of your delicious, juicy fillings are in place, you can wrap that sucker up.  If you make sandwich wraps at home, it's the same basic principle.  Fold up the bottom flap so it covers or partially covers the filling, then fold over the left side, then the right side, then roll it up to seal it.  The starch in the wet rice paper provides a nice stickiness that will keep the roll together.

Montage:

making spring rolls

[soaking rice paper - rice paper ready to blot - adding filling - cooked vermicelli - making bottom flap - folding left side - folding right side - rolling it up - complete]


Spring roll

[mmmmm...]

One last note:  peanut satay sauce makes an excellent dip for these rolls (and you know I love dip).  For peanut satay sauce you can go fancy or simple.  Ours was more of the simple variety and paired beautifully with the rolls.  

Tuesday, February 22, 2011

Michael's blanket

It's been quite a year for babies amongst our friends!  Shortly after finishing Gretta's blanket, I picked the needles up and started right into another blanket for another great pair of friends.  The little bundle of joy, Michael, was born on the last day of January to some pretty happy parents!

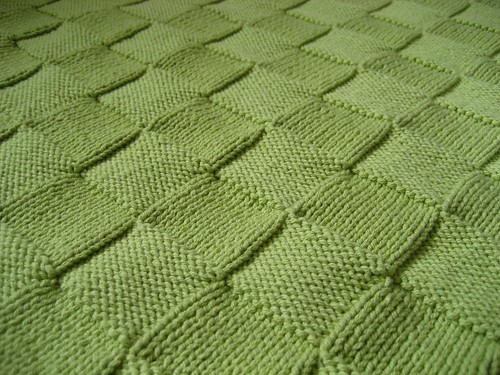
And I got to visit him just last week!  Such a happy little sweetie.  I think he'll look great wrapped up in this little basketweave blanket.  Knitters can find my pattern modifications at the bottom of this post.

Baby blanket

Basketweave

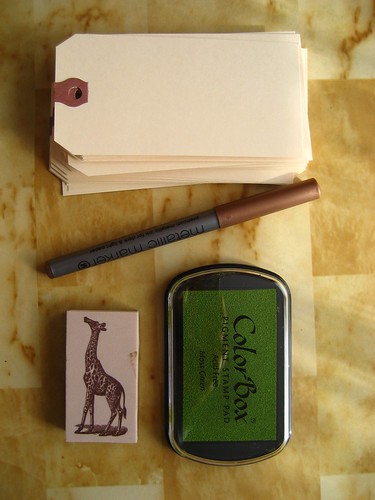
I made the tag with supplies from my craft box:

Tag supplies

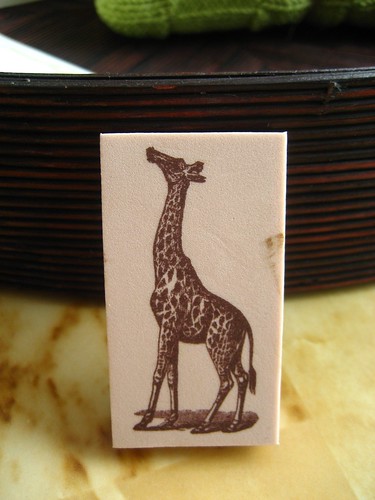
Giraffe stamp

Isn't the stamp great?  I thought a giraffe was suitable for a little baby boy.  It came from a stamp set I got a few years ago.  The images are woodcuts taken from an old edition of Webster's Dictionary.

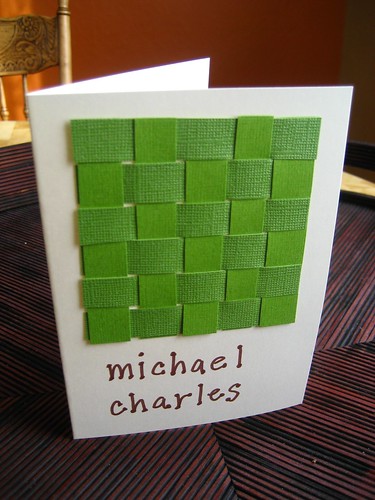
And the gift wouldn't be complete without a handmade card:

card

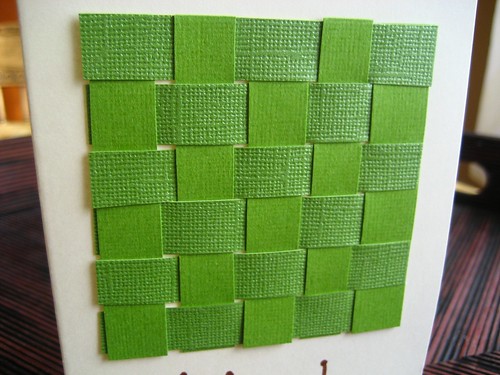
I tried to emulate the "basketweave" pattern of the blanket on the card by weaving strips of cardstock together:

Card weave design

Now, on to the knitting details!

  • Find my Ravelry project here
  • I wanted to make this blanket suitable for a car seat/carrier, so it measures 30" x 31.5"
  • According to my initial swatch and desired size, I loosely cast on 144 st
  • Needle:  29" 4mm circular
  • I went for a seed st border (k1, p1 and repeat for one row, then knit the purls and purl the knits for subsequent rows) of 14 rows deep
  • For the 15th row (the first row of basketweave squares) I began a 12 st side border in seed st, then k10, p10 and repeat until 12 st from the edge (seed st last 12 st)
  • [In retrospect I would have cast on 140 and made the side borders 10 st wide instead of 12]
  • Each basketweave square is 14 rows x 10 st
  • After 14 rows, simply switch knit sections to purl and vice versa
  • When 2" from desired length, revert back to seed st for 14 rows and loosely bind off
  • Yarn is Lion Brand Cotton Ease - machine washable and dryable!  Essential for a little babe.

And that's all I have to say about that.  Michael, I hope the blanket keeps you toasty this winter and I just can't wait to see you next time!

More of my knitting posts can be found here.

Saturday, January 15, 2011

Wedding Retrospective: The guest book(lets)

Well, it's been ages since the wedding... but I realized there were still a few projects I hadn't yet blogged.  Also, we are right in the thick of wedding-planning season for any Spring brides out there!  It was two full years ago that I was pulling this project together.

IMG_2942

[finished booklets]

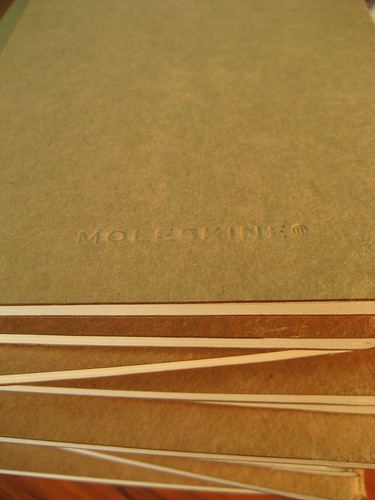
Initially, these booklets were going to be labeled as table numbers.  I had seen a great tutorial for making the booklets on the DIY Wedding section of the amazing Once Wed, and instantly loved the idea.  As time went by and the decor/venue plans evolved, I decided the booklets might be too small to serve as a table marker.  Instead, I decided a booklet at every guest table would take the place of a single guest book at the front of the hall.

Why a whole bunch of little booklets instead of one normal guest book?  I liked the idea of people being able to take the time to write a thought or a story or a bit of advice for us instead of just writing a short greeting and signing their names.  Mike and I have a lot of creative/hilarious/thoughtful friends and family members in our lives and I wanted to capture more from them than simply "Congratulations and Best Wishes".

IMG_2904

[moleskine booklets]

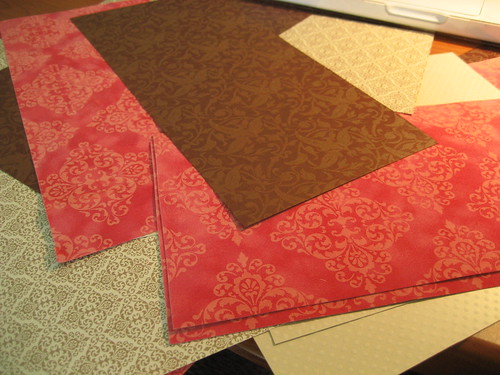
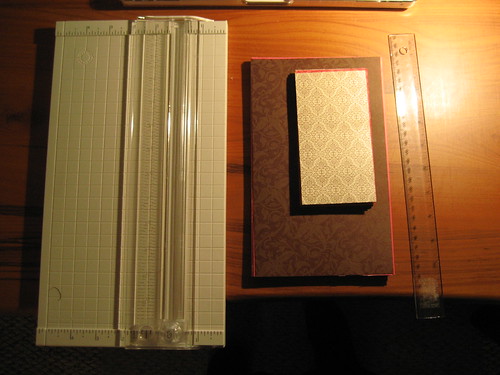
My favorite - totally favorite - part of the project was choosing the paper.  (I have a thing for paper).  Our colours (as you may know from previous posts on the wedding) were pink and brown and cream.  Most of the paper was found at DeSerres in Halifax with a few special (i.e. velvet-texture pink damask) sheets from Michaels in St. John's.

IMG_2908

IMG_2708

[paper]

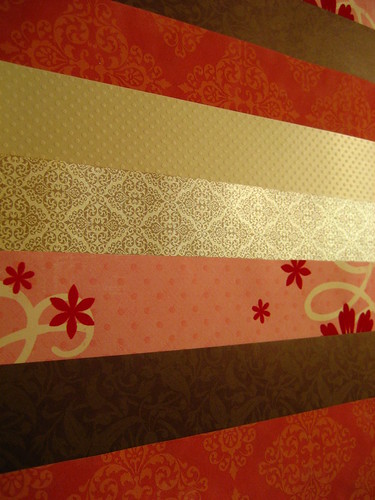
I found a paper cutter came in handy for this craft (and for several crafts thereafter).  I simply cut strips of  the paper to cover the Moleskines with about an inch of extra paper left to affix (using double-sided acid-free tape) onto the inside front and back covers of the books.

IMG_2922

[supplies]

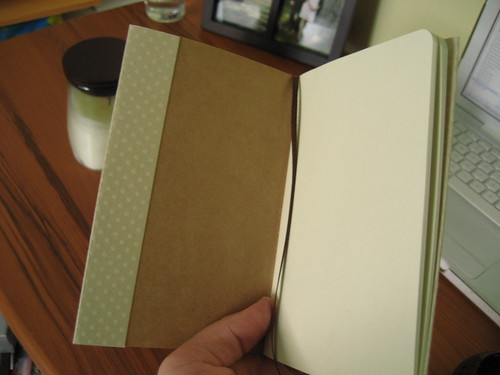
Another cute feature of the booklets was the ribbon page-marker.  I found a thin, satin finish ribbon, cut the end on the bias and a few inches longer than the spine of the booklet, then taped one end of the ribbon to the outside spine of the booklet before covering it with paper.

IMG_2949

[page-marker and inside cover]

IMG_2946

[page markers in finished booklets]

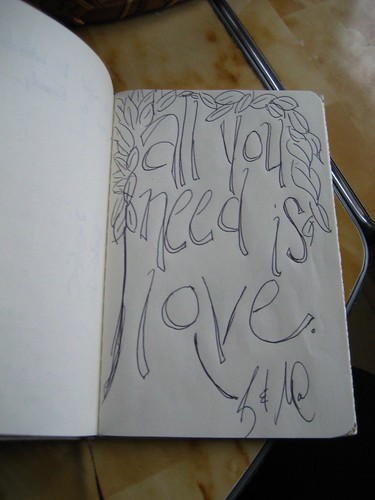
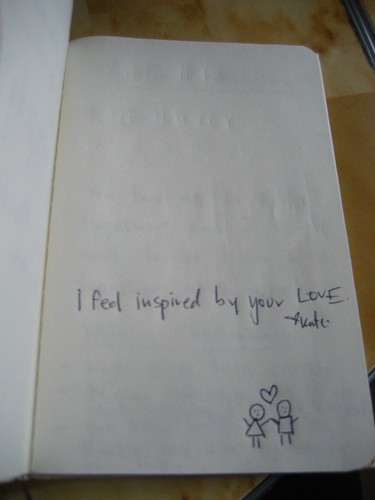
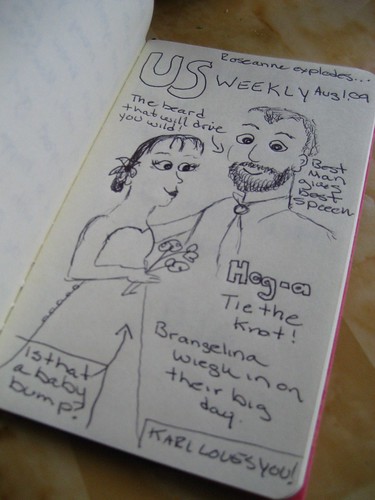
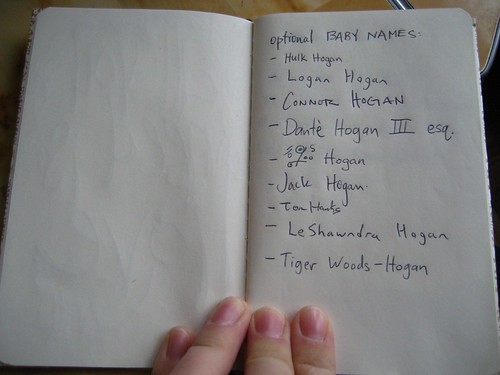
Now, Mike and I have a little shoebox containing the booklets.  They are filled with notes, funny stories, hilarious kids drawings, a limerick, a list of potential baby names, tear-jerking memories, hilarious grown-up drawings, and some really lovely poems.  In retrospect, this might have been the best DIY project of the whole wedding!  Re-reading them over the past few days has reminded me how amazing our wedding guests were and how lucky we were to have so many friends and family members join us!

And now, loyal readers, I will give you a peek into our guest book(lets):

Guest book

Guest book

Guest book

Guest book

Guest book

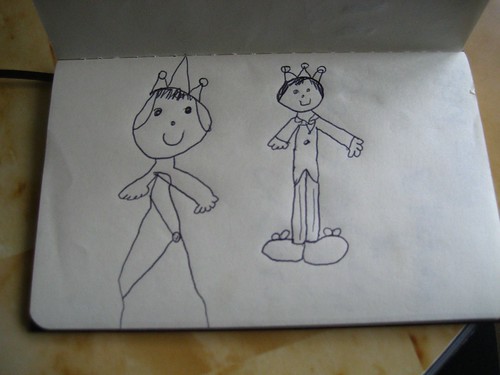
This last drawing by Mike's little cousin was accompanied by the charming caption, "You are now royalty".  So sweet!

Monday, December 13, 2010

Eggrolls

Eggrolls!  Homemade eggrolls!  The best kind of eggrolls!  And I would know - I'm on PEI, the place where eggrolls are everyone's favorite Saturday night snack (along with the rest of Special Plate C).  Some say the Canton Cafe is the best Chinese food here, some prefer China Garden, some love Blossoms, but my favorite Chinese food are the eggrolls that come from Souris West.

Eggrolls

My parents make these every year.  This year, they waited for me to arrive home-from-away before the annual event.  I always heard about these eggroll-making nights but was never witness to one.  Until now.

Pork, shrimp, and veggie filling

So, up until now, I was under the impression that the delicious crumbly filling, the one with the perfect balance between meat and vegetable and just the right amount of saltiness, was my father's own creation.  After my inclusion in the ritual, however, I came to realize that the filling is made using the recipe on the eggroll-wrapper box.  Wong Wing.  No matter, the stuff is still just as delicious!  This year, Dad added a few diced shrimp to the pork recipe.  I also realized it would be super easy to make an all-veggie version of the eggrolls.

Prepping shells

The eggroll wrappers come in packages of approximately 50.  They come apart easily.  The "glue" that sticks the wrapper together in all the appropriate places is egg white.  Get it?  Eggroll!  Take a little silicone or nylon brush (the kind you might use for BBQ sauce), dip it in the egg white, and paint three borders of the square wrapper.  The borders should be about an inch thick.  You then add a dollop of filling (not too much, not too little - you'll get the hang of it).  Make sure to not get any filling on the outside edges of the egg white border.  The moisture of the filling prevents a good seal and then you get a lot of snap, crackle and pop during the (spoiler!) deep frying phase.

Sealing

Directions for wrapping the eggrolls:  first fold the non-egged edge in towards the middle of the wrapper, over part of the filling (this is one of your long edges), then pinch one end of that folded-over piece, to hold it in place.  Fold over the other long edge, overlapping the first edge by about 1 cm, and press down lightly to seal.  Now press each end tightly to seal.  You can also use a fork to really crimp the edges down (as shown above).

Ready to fry

Your wrapped products should look like this.

Heating oil

Now they are ready for the oil (we used canola).  I prefer not to really provide instructions on how to heat the oil.  I just have to say *do it safely*.  You may have a deep fryer, or you may have a pot like we do.  *Do not leave the pot unattended at any point*.  Read a few deep frying tutorials on line, or ask an experienced deep fryer for tips.  I am not an experienced deep fryer.  I am a little scared of hot oil, not gonna lie.

Frying

Here they are, frying away to a sizzling, golden brown.  Prior to frying, make sure all of the edges of the rolls are still sealed - as I mentioned above, if the filling comes in contact with the hot oil, you will have some noise and some spatter.  As far as cooking time, you have to play around and get the feel for it.  After a few minutes, one side will be brown enough.  You then flip it, and fry the other side until done.  Use a metal slotted spoon to remove the rolls from the oil, and place onto paper towel to absorb excess oil.

Now, after all the scariness of the hot oil, we are rewarded with some amaaaazingly delicious eggrolls!

Homemade eggrolls

As delicious as they look.  We made 100.  Wonder how long they'll last over the holidays?

Monday, November 29, 2010

Advent calendars

As it is almost December 1st, and I've been seeing so many advent calendars around the blogosphere lately, I decided I would provide you all with a little collection of my faves.  Some are very suitable for DIY.

The first is from Miss Gioia via oh, hello friend (who happens to have an excellent round-up of advent calendars).  I am in love with this one - it uses an increasing amount of buttons to indicate the number of each pocket.  Love, love, love.


The next is actually a DIY project and comes from Paige Russell via Poppytalk.  I think the stark white mixed with rainbow bright colours would be perfect in a modern home or apartment, don't you?


Here is a fun little pyramid calendar from Country Living.  I found it courtesy of craft lovely.  If you are like me and love candlelight, and prefer a matchstick to a lighter, you may just have a few matchboxes lying around.  Alternatively, you could purchase a multipack of matchboxes and store the matches in a large jar while the boxes are re-purposed.


This final calendar is a beautiful print-it-yourself project by Jen Hill (found via the ever-addictive Design*Sponge and their round-up of calendars in general).  It comes free with purchase from her shop or you can get the .pdf for $5 on her site.


If this post inspires you to make up your own advent calendar, I need to see pictures, so let me know!

Saturday, February 27, 2010

Wedding Retrospective: favours

Our wedding was almost seven months ago, but it's been on my mind lately.  I've also got several friends who are in the midst of wedding planning lately (exciting!!).  And so, I thought I would continue on with my wedding preparation series. 

This entry is all about the favours we gave to our guests.  Before I get into the assembly/design of the favours, I need to give a HUGE shout-out to my parents.  While I was in school in Newfoundland during the spring preceding the wedding, they made batch after batch of mustard pickles and salsa - the preserves that filled our favour jars.  My only role was in decorating the jars.  And I had help with that from both my mom and Mike's mom.  Our wedding would never have happened without support like that from our family and friends. 

So here is a little jar-decorating tutorial.

The required supplies:

IMG_3294
  • coordinating fabric
  • pinking shears
  • raffia (craft straw)
  • double-sided tape
  • elastic bands
  • 2" circle craft punch
  • cardstock, printed with message
  • paper cutter
  • and of course, the preserves!
First step:  cutting fabric squares.  These were about 5" x 5" to fit our standard 125 mL preserve jar lids.  This step was definitely "rate-limiting", so plan ahead and enlist some help in cutting!  I chose pink- and ivory-coloured fabrics to differentiate the two types of preserves.

IMG_3301

Next step:  punching out our labels.  I used a 2" craft punch (found at Michael's) for this job.  There are a few different types of craft punch; mine was the type where you could see exactly what you were cutting.  With some punches, you are cutting blind.  That would not have worked for these labels - we had them spaced very closely (to save cardstock) and had little room for error.  I first cut the printed pages of cardstock into strips, then cut each of the circles out with the punch.

IMG_3297

A step I don't have a picture of is fitting the fabric around the jar lid.  We did this with elastic bands.  Raffia wasn't enough to hold the fabric in place - the elastic bands made the job a lot easier!

Next step:  raffia bows.  This step was a little annoying but the end effect was exactly what I wanted.

IMG_3304

We then affixed the labels to the fabric with double-sided tape:

IMG_3309

Here are two of the finished products.  They were a hit at the wedding.  The groom and best man even cracked open their mustard pickles at the reception!

IMG_3317

Again, thanks to everyone who helped with the wedding preparations! 

Tuesday, October 20, 2009

Wedding Retrospective: pew markers


If you look directly behind my head in this picture, you can see one of our pew markers.  They were very simple to make; the hard part was deciding on a final idea for them.  We wanted something simple and elegant - no lace, no bows.

We (and by "we" I mean Mom and I) wanted ten markers.  So, we couldn't spend a fortune on each piece.  We needed something that we could find in bulk for a good price.

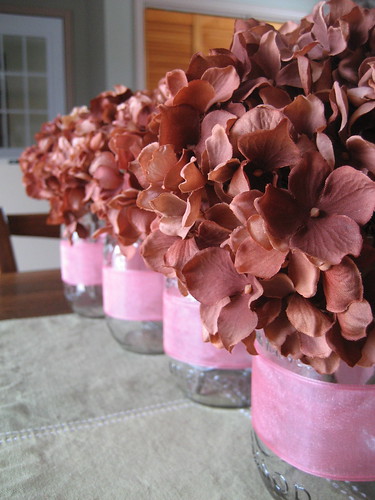
In keeping with the theme of the favors (to be seen in a future post), we decided to go with Mason jars as the base of the marker.  We easily found ten around the house.  The best part of using Mason jars is that they're totally reusable.

We then proceeded to wrack our brains about what would go in the jars.  Fresh flowers from the florist were a little too pricey for us - we preferred to spend our floral budget on the girls' bouquets (my amazing aunt crafted all the boys' boutonnieres for us!).  We next priced faux flowers at Michaels, which were shockingly expensive.  But, as luck would have it, on the way out the door, we spotted some pre-made 'bouquets' of hydrangeas on sale for about 70% off.  What was more fortunate was the colour - brown!

We were then off to find the finishing touch - two inch pink ribbon.  This we found at our florist who sold it by the metre.

We decided we'd hang the jars from the pews with some 'rustic' twine.  Hint:  go to the dollar store for twine - we tried agricultural supply places first and apparently most twine is blue these days!  Not the rustic look we were going for!

IMG_3424

IMG_3425

Here you can see the finished products (minus the twine for hanging).  Ribbon was wrapped two or three times to deepen the colour (the best colour we could find was a sheer pink) and secured with double sided tape.

The hydrangeas were trimmed using wire cutters so that they would sit snugly in the mouth of the jars.  This project definitely worked well with the fullness of the hydrangea - a single bloom per jar was sufficient.

Post a comment if you have any questions!  For more of my wedding posts, look here.

Thursday, September 10, 2009

Wedding Retrospective: bridesmaid thank-you cards

So as most of my readers know, Mike and I got hitched this summer.  The wedding and all its DIY/crafty goodness went down before the birth of my little blog here.  So I am starting a series of posts:  Wedding Retrospective.  There are several little projects I pulled off that I'll detail here on runty mouse.

The craft I'll show you today came about six months before the wedding.  My amazing bridesmaids and maid-of-honour had been listening to me waffle over wedding details, had all flown to Ottawa in November for a dress-shopping, girls-weekend excursion, and I was generally feeling like a very loved bride.  So I wanted to make up some thank-you cards for them, in advance of the wedding.

Our colours were pink, brown and ivory.  The bridesmaid's dresses can be seen below (in action!).

photo credit: C. Forbrigger via Facebook

I thought the dress symbolized the role the girls were playing.  It was a simple, clear image that would mean something to them on first viewing.

I found some beautiful, textured paper at Michael's to use as the "dress" - almost a velvet texture, with a lighter-toned damask pattern (I'm a sucker for damask).  The rest of the paper was lightly textured cardstock.  Mmmm, paper.

A mock up of the "dresses":

IMG_2686

And now, the finished products:

IMG_2689

It was a fun little project that certainly got me into the wedding planning mood and that I hope showed the girls how grateful I was (still am!) for their help and support!