Recent Posts

Thursday, December 31, 2009

North side tour

I never have as much time in PEI as I'd like.  Already, I've left the Island, for a few short days in Halifax before flying back to the Rock.  When I'm there, I like to spend at least some time outdoors.  While Christmas holidays are pretty busy with indoor family events (as my last post discussed), my brother and I managed to get out for a morning drive out the North side.

the Northside

The drive was intended to not only see the countryside but to work out my favorite Christmas gift:  the Pentax K100D, given to me by my wonderful and thoughtful husband.  Hope you like the products of the photo shoot.

Rosehips and lichen in Bayfield:

rosehips

lichen

Old buildings in Priest Pond:

old house

old barn

Lobster trap at Campbell's Cove:

Campbell's Cove trap

Fishing huts at North Lake:

North Lake

This goes to show there is great scenery in Eastern PEI, even on a grey winter day, even without a pretty snowfall dressing things up.  For some amazing shots of Eastern PEI, you definitely need to visit the Eastern Kings Meeting Place to look at the photo-of-the-day and link to the archives.  Thanks to Waldron Leard for all of his tireless work in making that site what it is - a treasure for all Islanders.

Until next time, PEI!

Tuesday, December 29, 2009

Family Christmas

Not one, but two families to celebrate Christmas with this year!  That involved a lot of road-running between the two homesteads, but of course the busy-ness was worth it - hanging with the parents, getting to see (almost) all the siblings, TWO turkey dinners on Christmas day, and multiple games of Settlers.

The Christmas trees:

 Hogan tree

O'Connor tree


The decorations:

glitzy decoration

village workers

The coffee in traditional family mugs:

Hogan coffee

O'Connor coffee


The Settlers!

settlers

settling

Although we now need a vacation from our vacation, it was a wonderful visit.  Merry Christmas.  I hope yours was just as fun.

Sunday, December 13, 2009

Old-school medicine

Vintage medical paraphernalia have a certain charm about them.  They also give me faint memories of the old hospital in my hometown, with all of its white-painted metal beds and cabinets.  There is something about mid-century (or earlier) medical items that seems so comforting and quaint.  Why not use some of these items as decor? 

I found these antique medicine bottles this summer at a yard sale on PEI.  Snake oil anyone?  If I remember to bring them back with me after the holiday, they'll join my insulator collection as window sill decoration.

IMG_3370

Now how about a Snellen chart for some mood lighting?


Now, this set I just can't resist.  I need them on a counter somewhere, full of nice sterile toiletry items.  Say ahh!


Here is a medical cabinet that has been repurposed into a gorgeous display cabinet.  I love the clean lines. 


This is another attractive style of medical cabinet.  I'll take it without the bedpans!


I think this post just scrapes the surface of what's available out there in the way of vintage medical items.  Let me know if you find any other interesting vintage medical finds in your web travels!

Friday, December 11, 2009

The festive season has arrived...

We attended our first Christmas party of the season last weekend.  Well, two, actually.  But I only have photos from the first one.  Thanks for a great time, Melissa and Phil!

Christmas party

This party had plenty of good friends, great food, and two of the cutest dogs you've ever seen.  The table was laden with dips, squares (or, as the Newfoundlanders call them, "cookies"), phyllo-wrapped brie with red-pepper jelly, and some very classic, delicious gingerbread cookies thanks to these two:

A&M

Now, back to the dogs.  Two of the most beautiful, well trained boxers you'd ever find.  Also, very loving.  I was lucky enough to grab a selfie:

Boxer kiss!

I am so in the mood for Christmas!  The family, friends, food, cozy warm homes, and a little break away from school.  Hope you are celebrating the season, wherever you are!

Christmas tree

Monday, November 30, 2009

Christmas Cookies

I am not a baker.  I'm an amateur cook, but not much of a baker.  However, a few years ago, some girls at work had a recipe-swap on the go.  I was the lucky recipient of the recipe for the best ginger spice cookies known to man!  These cookies have been shared, gifted, and bake-saled innumerable times in the past few years.  And now the recipe will be shared with you all.

IMG_3033

Warning:  These cookies are pretty spicy.  Do not attempt to eat without a full glass of milk at the ready, or - as I prefer - orange juice.


Ginger Spice Cookies
Makes ~ 36 cookies

Wet Ingredients:
1 cup packed brown sugar
3/4 cup canola oil
1/4 cup molasses
1 large egg

Dry Ingredients:
2 cups all-purpose flour
2 tsp baking soda
1/4 tsp salt
1 tsp ground cloves
2 tsp ground cinnamon
2 tsp ground ginger
1/4 tsp cayenne pepper

1/3 cup white sugar for decoration

1.  Preheat oven to 325 degrees F.

2.  In a large mixing bowl, combine wet ingredients and mix until blended.  In another bowl, combine dry ingredients and mix until blended.  Stir the dry mixture into the wet mixture in thirds.  Mix dough until uniform. 

3.  Using your hands, form dough into ~ 1 1/4 inch balls.  Roll lightly in white sugar and place 2 inches apart on an ungreased cookie sheet. 

4.  Bake for 10 minutes, until underside of cookie is just golden brown, and the top of the cookie has a cracked look.  They will be pretty soft at this point (i.e. you won't think they're cooked) but do firm up once cooled. 
Do not overcook or they turn into hockey pucks!  I usually cool them on a plate/solid flat surface.  It may take a while to get the cooking temp/time right depending on your oven and whether it runs hot or cold.  You could always cook a dozen at a time, using different temps and cook times.  Good luck!


IMG_3029


Just look at the crackly tops of those delicious little morsels!  They are especially attractive if you can find a nice coarse, granulated sugar for the topping.

Sunday, November 22, 2009

Sunday supper

Sunday supper this week was Nat's sweet potato and carrot soup with James' bacon, scallion, and cheddar cornbread muffins.  Two great recipes from two great friends.  The homebrew credit goes to Mike, brewer extraordinaire.

Sunday supper

Nat's Sweet Potato Soup

This soup can be made more or less spicy.  Today's batch had double the ginger, an extra clove of garlic, fresh ground black pepper and a 1/4 tsp cayenne instead of a pinch.  It had a nice kick to it.

3 sweet potatoes, peeled and cubed (1 cm)
2 carrots, chopped
1 onion, diced
2 cloves garlic, diced or crushed
1 tbsp ginger, minced or grated
1 1/2 tsp curry powder
1/2 tsp cumin

pinch cayenne pepper
4 cups veggie or chicken stock


Spices

Prepare veggies.  Heat some olive oil in your soup pot.  Saute the onion til softened and translucent; add garlic, ginger and spices and stir for 1-2 min to release flavours.


Add sweet potato and carrot; stir to coat.  Add 4 cups of stock.  Bring to a boil.  Reduce and simmer 20 minutes.  Puree in batches in a food processor or (I prefer) with an immersion blender.


Cornbread, Bacon, Cheddar and Scallion Corn Muffins
(from America's Test Kitchen cookbook via James)

Cheddar, bacon and scallion corn muffins

2 cups all-purpose flour
1 cup cornmeal
1 1/2 tsp baking powder
1 tsp baking soda
1/2 tsp salt
2 large eggs
1/2 cup sugar
8 tbsp unsalted butter, melted and cooled
3/4 cup light sour cream
1/2 cup partly skimmed milk
3 strips bacon, cooked and crumbled
bunch green onions/scallions, thinly sliced
2 cups old cheddar, grated (reserve 3/4 cup for topping)
freshly ground black pepper, to taste
 

Adjust oven rack to middle.  Heat oven to 400 degrees F.  Coat 12-cup muffin pan with cooking spray.

Fry bacon until crisp.  Blot.  Crumble.  Saute scallions with pepper to taste. Combine with bacon.  Transfer to a plate to cool.
 

Whisk first five ingredients in a large bowl until homogenous.  In a medium bowl, combine eggs and sugar.  Whisk in melted butter, sour cream, and milk until smooth.  Gently fold egg mixture into flour mixture with rubber spatula just until combined.  When almost combined, mix in cheddar and bacon-scallion mixture.  Be careful to not overmix.
 

Divide batter evenly into measuring cups using a scoop.  Top muffins with remaining cheddar. 
 

Bake until light golden brown and a toothpick inserted into the centre of a muffin comes out clean, or with crumbs on it, but not sticky batter (approx. 18 minutes).  Let muffins cool in pan for 5 minutes, then cool for 10 min on a rack before serving.  Best served warm.  Store leftovers in refrigerator and rewarm before eating.

This makes a hearty meal for a snowy November night.  I think the muffins will make for a hearty breakfast tomorrow morning as well...

Saturday, November 21, 2009

Saturday night

Saturday night

House update

I'm back!  Sorry for the ridiculous hiatus.  School got a little hectic there for awhile, but now I have a free weekend.  I'm very glad to have time to sleep in, catch up with people, clean my house, and blog!

So I made a previous post about our bare living room with some ideas to liven it up a bit.  Three months later, I have a response.  We did use most of those ideas and now have a very homey, cozy living room.

This is the before:

IMG_3749

...and the after:

Living room

My favorite part of the room is the wall art.  It took the better part of six months to get the posters, find a frame (from Ikea in Ottawa thanks to some work by tidyowl), modify the mats and upgrade some of the frame materials.  Finally, they are finished!  Eye candy for the living room.

Concert posters

Finally, here is the part of the house I've been spending the most time in:  the study nook.  You can probably see my butt print in the chair. 

Study corner

I'm hoping to move back to the kitchen tomorrow - so watch for new posts!

Saturday, November 7, 2009

Calgary

I recently spent several days in the lovely city of Calgary, Alberta. 

Skyline

I was there for an amazing conference, but I did have a few free hours to get out and see the city and some ex-pat Maritimers who live there.  Had a great visit with my old friend Adam (the above photo credit goes to him), and my pals Charlee and Will (below).

Calgary friends

Calgary is a very new city.  St. John's is considered the oldest city in North America.  I would like to take this opportunity to contrast the two - I think you'll agree that they are basically the Yin and Yang of Canadian cities.

  • In Calgary, all the streets are at right angles to one another.  In St. John's, the streets look like something out of a Tim Burton movie.
  • In St. John's, there is a dearth of attractive, eligible men.  In Calgary, the ratio of men to women is approximately 17.5:1.  To all the single ladies:  there are many fish in the sea, but there's nothing wrong with fishing in a stocked pond once in awhile. 
  • In St. John's, there are streets like Monkstown, or Carpasian, or Duckworth.  In Calgary, the streets were named by Donkey Decimal, Dewey Decimal's younger, more boring cousin.
  • In Calgary, you can see for miles around.  The Rockies are off to the west, Edmonton is a faint shadow to the north, and it's so flat you can even see the farmers waving at you from the Saskatchewan border.  In St. John's, you can see fog.
  • In Calgary, no one uses studded tires or a parking brake.  If you don't use those things in St. John's, your car will end up at the bottom of the harbour.
Calgary is just a great spot.  I can really see myself going back to visit some day.  I will now leave you with a glimpse of the most delicious part of my trip.  It was invented in Calgary, and Calgarian bartenders know how to do it right:  the mighty Caesar.

Mighty caesar

This little beauty was a mind-blowing blend of clamato and vodka, spiced with Tabasco and Worchestershire, topped with a hot pickled bean, a pickled asparagus shoot,  a wedge of lime and a dollop of horseradish, rimmed with steak spice...  Yep, definitely going back to visit some day!

Tuesday, October 20, 2009

Wedding Retrospective: pew markers


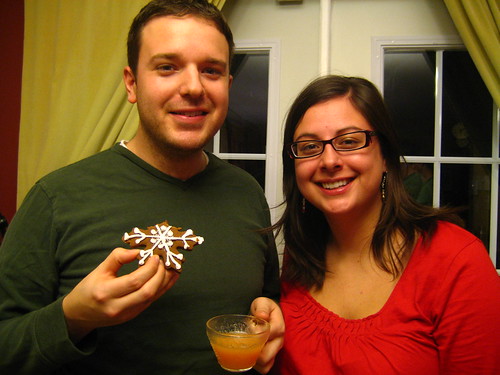
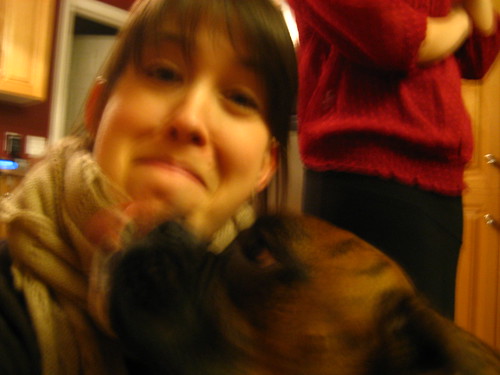
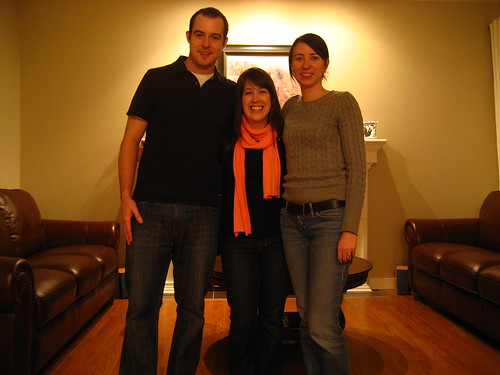
If you look directly behind my head in this picture, you can see one of our pew markers.  They were very simple to make; the hard part was deciding on a final idea for them.  We wanted something simple and elegant - no lace, no bows.

We (and by "we" I mean Mom and I) wanted ten markers.  So, we couldn't spend a fortune on each piece.  We needed something that we could find in bulk for a good price.

In keeping with the theme of the favors (to be seen in a future post), we decided to go with Mason jars as the base of the marker.  We easily found ten around the house.  The best part of using Mason jars is that they're totally reusable.

We then proceeded to wrack our brains about what would go in the jars.  Fresh flowers from the florist were a little too pricey for us - we preferred to spend our floral budget on the girls' bouquets (my amazing aunt crafted all the boys' boutonnieres for us!).  We next priced faux flowers at Michaels, which were shockingly expensive.  But, as luck would have it, on the way out the door, we spotted some pre-made 'bouquets' of hydrangeas on sale for about 70% off.  What was more fortunate was the colour - brown!

We were then off to find the finishing touch - two inch pink ribbon.  This we found at our florist who sold it by the metre.

We decided we'd hang the jars from the pews with some 'rustic' twine.  Hint:  go to the dollar store for twine - we tried agricultural supply places first and apparently most twine is blue these days!  Not the rustic look we were going for!

IMG_3424

IMG_3425

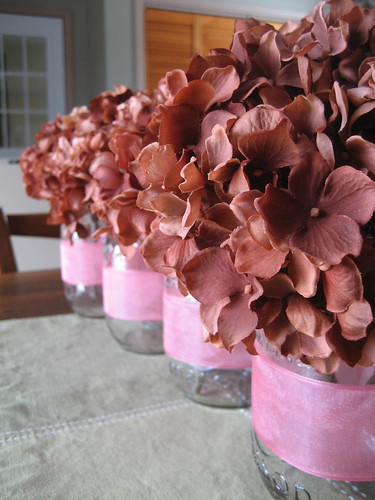
Here you can see the finished products (minus the twine for hanging).  Ribbon was wrapped two or three times to deepen the colour (the best colour we could find was a sheer pink) and secured with double sided tape.

The hydrangeas were trimmed using wire cutters so that they would sit snugly in the mouth of the jars.  This project definitely worked well with the fullness of the hydrangea - a single bloom per jar was sufficient.

Post a comment if you have any questions!  For more of my wedding posts, look here.

Monday, October 12, 2009

More Corner Brook

So, first off, I realized last week that it's actually Corner Brook, not Cornerbrook.  That was a very longstanding misconception of mine.  All is well now though...

So I went for a long Sunday drive today.  Ok, so it's Monday, but you know what I mean:  a relaxed, ambling drive, going lower than the speed limit, the locals on your tail and rolling their eyes...  I was on the lookout for more great scenery and it was not hard to find.

the river

The above photo was taken on a bridge that takes you from Corner Brook to the other side of the inlet/bay that Corner Brook perches on.  Continuing along that route, I got a great view of some of the larger mountains in the area.  Looks like we have snow afterall!

snow on the mountains

I also came across the railway museum in my ambling.  Having grown up in PEI, I think I am even less familiar with trains than most people my age.  Anything I know about trains comes from one Gordon Lightfoot song or another.  Well, these machines are huge.  They really capture the imagination.  Not hard to see why train travel has such a romanticism about it.

railway crossing

593

Hope everyone is enjoying their Thanksgiving, wherever you may be.

Saturday, October 10, 2009

Pico de Gallo

This tasty treat was actually made up several weeks ago now... I just remembered it when browsing through my iPhoto.  It preceded a nice feed of tacos.

Appetizer

I just made it up and I can't remember the exact amounts of anything... but I will attempt to write out the recipe below.

Pico de Gallo

Tasty snack

Pico de Gallo

2 Cubanelle peppers (green), seeded, finely diced
1 large tomato, seeded, finely diced
1/4 red onion, finely diced
juice and zest of 1 lime
~ 1 tsp coarse sugar
~ 1 tsp coarse sea salt
chopped fresh cilantro, to taste
freshly ground black pepper, to taste

 
Toss and serve with tortilla chips.  This recipe is quite juicy.  If you prefer it drier, I think you could combine the salt, peppers and tomato, wait for 20 - 30 minutes, drain the excess liquid, and then continue adding the remaining ingredients (adding more salt, to taste).

Sunday, October 4, 2009

Mittens

Remember, way back, I said I was currently knitting the Give A Hoot mittens?  Well, I finally got to finish them last week.  And not a moment too soon, it seems, as the temperatures took a dip this weekend.

mittens

mittens are finished!

I took them along on my walk in the park.  There turned out to be some excellent backdrops for my photo shoot!