Recent Posts

Tuesday, February 22, 2011

Michael's blanket

It's been quite a year for babies amongst our friends!  Shortly after finishing Gretta's blanket, I picked the needles up and started right into another blanket for another great pair of friends.  The little bundle of joy, Michael, was born on the last day of January to some pretty happy parents!

And I got to visit him just last week!  Such a happy little sweetie.  I think he'll look great wrapped up in this little basketweave blanket.  Knitters can find my pattern modifications at the bottom of this post.

Baby blanket

Basketweave

I made the tag with supplies from my craft box:

Tag supplies

Giraffe stamp

Isn't the stamp great?  I thought a giraffe was suitable for a little baby boy.  It came from a stamp set I got a few years ago.  The images are woodcuts taken from an old edition of Webster's Dictionary.

And the gift wouldn't be complete without a handmade card:

card

I tried to emulate the "basketweave" pattern of the blanket on the card by weaving strips of cardstock together:

Card weave design

Now, on to the knitting details!

  • Find my Ravelry project here
  • I wanted to make this blanket suitable for a car seat/carrier, so it measures 30" x 31.5"
  • According to my initial swatch and desired size, I loosely cast on 144 st
  • Needle:  29" 4mm circular
  • I went for a seed st border (k1, p1 and repeat for one row, then knit the purls and purl the knits for subsequent rows) of 14 rows deep
  • For the 15th row (the first row of basketweave squares) I began a 12 st side border in seed st, then k10, p10 and repeat until 12 st from the edge (seed st last 12 st)
  • [In retrospect I would have cast on 140 and made the side borders 10 st wide instead of 12]
  • Each basketweave square is 14 rows x 10 st
  • After 14 rows, simply switch knit sections to purl and vice versa
  • When 2" from desired length, revert back to seed st for 14 rows and loosely bind off
  • Yarn is Lion Brand Cotton Ease - machine washable and dryable!  Essential for a little babe.

And that's all I have to say about that.  Michael, I hope the blanket keeps you toasty this winter and I just can't wait to see you next time!

More of my knitting posts can be found here.

Friday, February 18, 2011

Stew and biscuits

A hearty meal for a chilly Upper Canada winter's eve.  That's right, I'm up in Ottawa visiting my sister!  We had a hankering for a traditional winter meal and decided beef stew would be it.

Let's start with the biscuits.  In my opinion, if you're going to have stew you need to have some type of bread product to dip into it.  My usual olive oil biscuit recipe was home in a drawer, so a quick google of the interwebs led me to this recipe from a lovely food blog.


Olive Oil-Parmesan Biscuits

Ingredients:

1 3/4 cups all-purpose flour
1 tbsp baking powder
1/2 tsp sea salt
coarsely ground black pepper to taste
1 cup milk
5 tbsp good quality olive oil
1/2 cup freshly grated parmesan (or other delicious firm cheese, e.g. cheddar)

Biscuit ingredients

[mmm, parmesan]

Biscuit ingredients

[Tidyowl's pretty vintage bowl]

Instructions:

Preheat oven to 450 degrees Fahrenheit. Lightly grease a standard baking sheet. Combine flour, baking powder, salt, and pepper until homogeneous. Add in wet ingredients (milk, oil, cheese) and stir until dough is just combined with an even consistency throughout. Using a potato/ice-cream scooper or 1/4 cup measure, dole out ~12 biscuit mounds onto the baking sheet. Bake for 10-12 minutes until lightly golden on the bottom.

Biscuits

Now, on to the stew! Beef stew is a pretty easy recipe to tackle yourself. It seems like everyone has their own particular version, but the basic method is probably the same. My version is as follows:

Beef Stew

Ingredients:

1-2 lbs stew beef, cubed
4 tbsp all-purpose flour
1-2 tbsp canola oil
2 medium onions, diced
2 cloves garlic, crushed
4 medium white potatoes, peeled and cubed
2 large carrots, peeled, halved and thickly sliced
4 celery stalks, halved and thickly sliced
1 can whole tomatoes, quartered (reserve juice)
4-6 cups beef bouillon (or more depending on desired volume/juiciness)
3 bay leaves
freshly ground black pepper to taste
salt, to taste

Instructions:

Heat oil in your soup/stew pot over medium-high heat. Dredge beef cubes in flour +/- black pepper if desired. Add beef to pot. Cook, turning occasionally until edges are browned and partially crispy. Transfer beef to a plate. (While going through the next steps, you can further cut up the beef into bite sized portions if required.) Add onions and garlic plus a splash of water or bouillon to deglaze the pot. Heat until onions are translucent. Add in tomatoes + desired amount of juice (I used about half of the leftover juice). Add beef bouillon. Bring to a low boil over medium-high heat. Add potato, carrot, bay leaves, black pepper and beef to the pot. Return to a simmer over medium-high heat, then cover and reduce heat to low and let simmer for 20 min. Add celery. Simmer, covered, on low heat, for 10 min. Taste for saltiness and season if necessary (I find that the bouillon provides enough salt). If you find the vegetables too firm at this point, you can simmer for a longer amount of time. To thicken the liquid (if you so desire), slowly add two tbsp of flour into 3-4 tbsp of water, making a slurry.  Ensure there are no lumps or clumps in the slurry, then add to the stew liquid.  Simmer uncovered for several minutes. The stew is now ready to eat, although the taste will become richer and the beef more tender with further reheating.

Beef stew

As an afterthought, mushrooms wouldn't go astray in this stew either.  Do you have any tips for stew/biscuit making or any secret ingredients?  Leave a note in the comments. (I love it when you guys leave comments!)

Tuesday, February 8, 2011

Whoopie!

Whoopie pies to be exact!  Our day-before-the-Superbowl Superbowl food party needed something over-the-top for dessert.  I wanted to do something with an American theme.  I have been seeing whoopie pies all around the blogosphere.  As proof that they are a true American treat, I hereby link to a recent story covering Maine's quest to make the whoopie pie their state dessert!

Whoopie pies

Also, this will officially be the the last post in which I state that I am not a baker.  Because for Christmas Mike and I were lucky enough to receive both a hand mixer and a stand mixer.  There is nothing I can't bake now, baby.

Mixing

So, the whoopie pie.  If you remember Jos. Louis, it's basically like that but without the chocolate(ish) coating.  Two chocolate cookie-cakes with a creamy vanilla filling in between.  A.k.a. a hamburger of happiness.

Whoopie pies

I found my particular recipe on Epicurious.  It didn't involve shortening or lard so that was a plus in my book.  If I'm picking my poison with respect to solid fats, I'll pick butter any day.

Cake ingredients:

2 cups all-purpose flour
1/2 cup cocoa powder
1 1/4 teaspoons baking soda
1 teaspoon salt
1 cup well-shaken buttermilk
1 teaspoon vanilla
1 stick (1/2 cup) unsalted butter, softened
1 cup packed brown sugar
1 large egg


Whoopie pies - ingredients


Brown sugar bear

Filling ingredients:

1 stick (1/2 cup) unsalted butter, softened
1 1/4 cups confectioners sugar
2 cups marshmallow cream such as Fluff
1 teaspoon vanilla


Icing ingredients

Here are the instructions from Epicurious, with my mods added in.  For the original recipe, see the link (above).

Cake instructions:

Preheat oven to 350°F.

Whisk together flour, cocoa, baking soda, and salt in a bowl until combined. Stir together buttermilk and vanilla in a small bowl.

Beat together butter and brown sugar in a large bowl with an electric mixer at medium-high speed until pale and fluffy, about 3 minutes in a standing mixer or 5 minutes with a handheld, then add egg, beating until combined well. Reduce speed to low and alternately mix in flour mixture and buttermilk in batches, beginning and ending with flour, scraping down side of bowl occasionally, and mixing until smooth.

Whoopie pies - cake batter

Spoon 1/4-cup mounds of batter about 2 inches apart onto 2 buttered large baking sheets. Bake in upper and lower thirds of oven, switching position of sheets halfway through baking, until tops are puffed and cakes spring back when touched, 13 - 15 minutes. Transfer with a metal spatula to a rack to cool completely.

Whoopie pies - cakes

Filling instructions:

Beat together butter, confectioners sugar, marshmallow, and vanilla in a bowl with electric mixer at medium speed until smooth, about 3 minutes.  (BTW - this stuff is beyond amazing.  Stiff texture, nice vanilla flavour.  Bet it would be great with real vanilla from the Caribbean).

Icing

Pie assembly:

Spread a rounded tablespoon (or several tablespoons) filling on flat sides of half of cakes and top with remaining cakes.

Whoopie pies - cakes

Whoopie pies - icing

The recipe says that the cakes can be made three days in advance and stored between sheets of wax paper, unrefrigerated in an airtight container.  We kept a few fully assembled cakes overnight (to eat at the actual Superbowl) and they kept quite well.  They seemed more moist on the second day - maybe the cakes absorbed some creaminess from the filling.  They also say that the filling can be made four hours ahead and kept covered at room temperature.  I assembled the cakes a few hours before serving and kept them covered at room temperature and they did keep very well.

Whoopie pies

This recipe makes eight hamburger-size whoopie pies.  Next time, I think I'll try making mini-versions that are closer to biscuit-size.  And there will be a next time.

Thursday, February 3, 2011

Guacamole

Guacamole is something I didn't know existed until my early 20s.  Sad, I know.  Well, maybe I had heard of it by then, but I had never tried it.  Anyway, I now know and love it.  Most of you probably already have your own favorite way to whip up this delicious dip but for those of you who have not ventured to try it, here's a little tutorial.

Ingredients

The academics tell me that the original guacamole was no more than avocados and salt.  I prefer a few more ingredients (and I think these are pretty common ones in your everyday North American guac).

Ingredients:

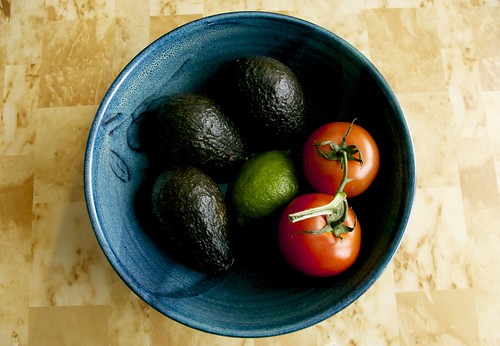
3 ripe avocados, mashed
2 ripe tomatoes, diced
juice of 1 lime
handful of fresh cilantro
a few good dashes of Sriracha sauce
salt, to taste

When I first started making my own guacamole, someone showed me how to prepare the avocado:

Avocado

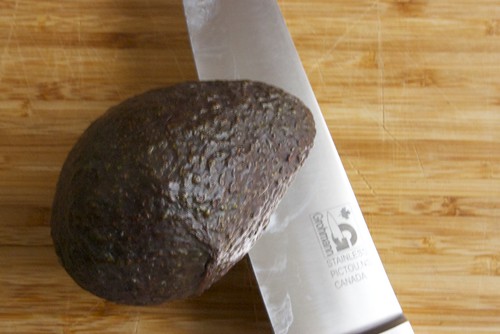
1.  Remove knobbly stem thing (upper right corner)

Avocado

2.  Slice lengthwise with a sharp knife, circling around the hard pit in the centre.  It's hard to capture this one on camera.  Basically, hold avocado in one hand, make a lengthwise cut until your knife hits the pit, then rotate avocado until you've made a lengthwise cut through the entire flesh.

Avocado

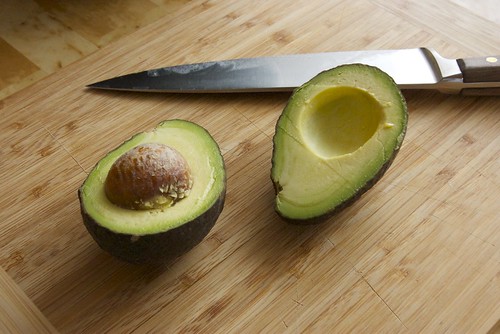
3.  Keeping knife inserted as in Step 2, rotate slightly until avocado separates into two halves.

Avocado

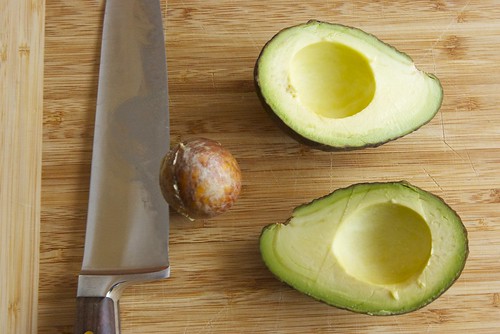
4.  To easily remove pit, hold avocado carefully in one hand and with the other, carefully tap the long side of the knife so it sticks in the pit.  Gently rotate the knife handle in the plane of the avocado's surface and the pit will twist right out (if it is ripe!).  Tapping the pit with a spoon on the knifed-side will release it from the knife.  It's a slippery little thing, always gets away on me.

Avocado

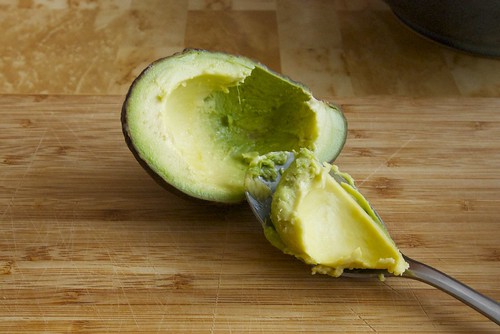
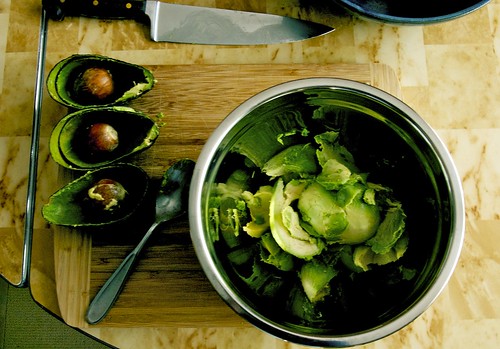
5.  Spoon out flesh from each half, discarding any bruised areas.  Be sure to scrape out all the outer layer of dark green flesh - I think it makes for a more attractive dip!

[Tip for avoiding bruised flesh:  purchase firm avocados before they are ripe and let them sit on the counter until they are ready.  Let their softness tell you when they're ready to eat!  Buying soft avocados has backfired on me more than once.]

So now onto the guacamole-making!

Avocado

Scoop avocado into a large bowl.  Sorry this picture is a little weird, I think my camera did something automatic.

Limes

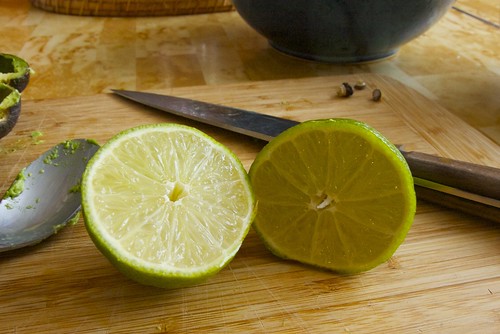
Add the juice of one lime.  Like apples, avocado flesh tends to turn brown when exposed to oxygen.  Unlike apple slices, mashed avocado cannot be dipped in 7-up to prevent this.  So you need a healthy dose of the acids in lime juice to keep your guac green.  The acid isn't the only reason for the lime - it adds great flavour as well.
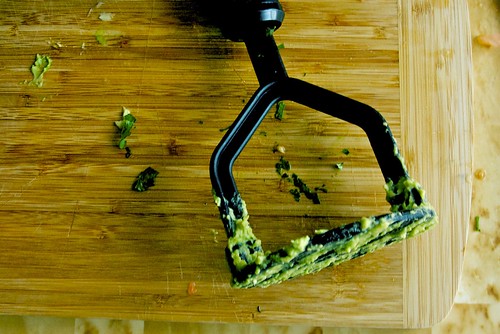
Masher

Mash it up.

Sliced tomato

Seed your tomatoes and dice up the firm outer part into small cubes.  Mix into avocado.

Here is where you can add the handful of cilantro (or more if you are a cilantro lover!).  No pictures - ours was several days old and still tasty but no longer photogenic.

almost guac

Add in your desired amount of Sriracha and salt.  Mix well.

Guacamole

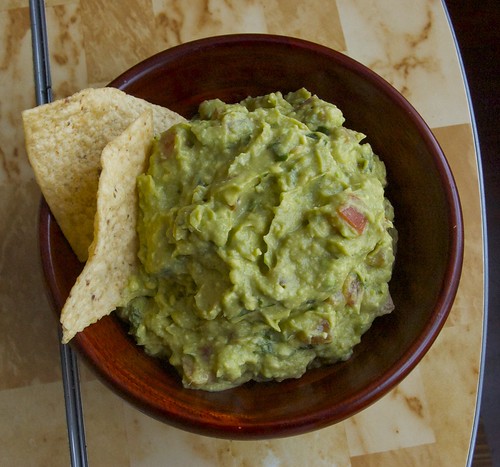
If you have willpower, let chill for a few hours in a covered container.  When you're ready to eat it (I'm not going to judge if you didn't let it chill), serve in an attractive bowl with nacho chips for dipping.  Alternatively (my plan) - taco night!

Another Mexican-inspired appetizer for you here.